Showing posts with label recipes. Show all posts

Monday, September 24, 2012

Sweet Tater Pancakes and Zucchini Scramble

 I've got a yummy recipe for you all today.  These sweet potato pancakes would be perfect for a breakfast or brunch.  We like them for dinner, and they are sweet enough that you don't even need syrup (although they certainly go well with pure maple syrup or agave syrup too.)  I've paired them with a simple zucchini scramble to make a Feingold-friendly as well as clean eating approved.
 Sweet Tater Pancakes
You need: 
     *1 1/2 cup whole wheat flour
     *2 tsp cinnamon
     *1 TBS baking powder
     *1 tsp salt
     *1 large sweet potato
     *1/4 cup melted butter
     *2 eggs, beaten
     *1 tsp agave syrup
     *1 1/2 cups milk
     *coconut oil for the skillet or griddle


 To make:
1.  Cover the sweet potato with water in a pot and boil for 20 minutes.  Remove the sweet potato and put immediately into cold water.  Slide the potato skin off and throw away.
2.  Cut up the sweet potato into cubes.  If the center of the potato is not completely cooked, put it in the microwave for a couple of minutes.  Mash up the cubes.
3.  Add the butter, eggs, agave, and milk to the sweet potatoes and mix well.
4.  In a separate bowl, mix the dry ingredients (flour, cinnamon, baking powder, and salt.)
5.  Add the dry ingredients to the sweet potato mixture and mix.
6.  Grease your skillet or griddle with a little coconut oil.  Spoon the batter onto the griddle in heaping tablespoons.  Watch for bubbles to rise to the top before flipping pancakes to the other side.  These pancakes will be a bit thick; so check to make sure they are cooked through before removing them from the griddle.
 Zucchini Scramble
You need:
     *1 medium zucchini, diced
     *5 eggs, beaten
     *1/2 cup milk
     *dash of paprika
     *dash of cinnamon
     *1 TBS olive oil
 To make:
1.  Saute the zucchini in the olive oil over medium-high heat until nearly translucent and browned.
2.  Mix the eggs, milk, paprika, and cinnamon together.
3.  Pour the egg mixture over the zucchini and stir frequently until the eggs are cooked through and no liquid remains.
(This served our family of 6 - two adults and four somewhat hungry small children.  There were even extra pancakes to put in the refrigerator for the next day.)
Enjoy!

Thursday, June 14, 2012

Fits the Feingold Diet - Snack Time

Surprisingly, the transition to making most of our food from scratch has been a relatively easy one.  I am getting more comfortable in the kitchen, making bread twice a week as well as several snack foods.  These honey graham crackers are so yummy and easy to make.  I make up a double batch of the dough and freeze it in several rounds.  That way, I can just pull out a round to thaw when we need some more crackers and bake 'em up.  I'm not patient enough to roll out a perfect rectangle and cut graham crackers out that look like the ones you buy at the store.  So, I just scrounge around in my cookie cutter box and use whatever looks like fun at the time.  The Beast called the ones in the picture above "pirate cookies", because he said they looked like gold doubloons.  Whatever works, right?!  I've also made them in teddy bear shapes - giant teddy grahams.  Anyway, you can find the recipe I used here at Foodie Bride.  
Another favorite snack around here are animal crackers.  Only, ours never look like animals.  Sometimes they look like maple leaves or stars or hearts, but mostly the kids choose alphabet shapes for their cookies.  The Beast prefers only letters that exist in his name, the number 3, and the number 8.  The Spud likes to get as many cookies out of the dough as possible so there always ends up being a lot of sevens, lower case l's, and ones - ha!  Anyway, I mentioned this link before in a potpourri post, but you should definitely try this recipe for animal crackers.  Like the graham cracker dough, you can freeze this dough too in portions to be pulled out and thawed as needed.
However, the snack of choice around here are my homemade granola bars.  I found this recipe a year ago and have made it countless times since.  When made with a cup of chocolate chips (Feingold approved, of course) and a cup of shredded coconut, they are so good that you think you are cheating on granola bars with cookie bars or something.  I make 24 bars at a time, but they are always gone within a few days.  So good!

It's snack time!  Pick one to try with your family today.

Friday, May 25, 2012

Potpourri of the Week #3

The Nerd went to a business conference this past week.  He left me with four kids and five cold rainy days.  This means trouble, in case you have never mixed kids and rainy weather.  Thankfully, my mother-in-law has helped (forced) me out of the house to alleviate some of the stir-craziness in the kids.  We have been quite busy and way off schedule.

Anyway.  So the bottom line is that I haven't done a whole lot of reading or googling or much of anything this week, really.  It's a shame because I just can't sleep with my man gone and I could have been really productive with that kind of time.  Oh well, laundry and dishes are done at least.  All kids are accounted for and have been bathed on a somewhat regular basis.  Little Sprout is practically sitting up on her own now and scooting around the room in a most disconcerting fashion.  It's been the perfect combination of busyness and lazyness.  Still, here are a few things worth mentioning:

1.  I have wasted time a-plenty on Pinterest for sure.  I am trying to figure out what to do for the Beast's teachers for their end-of-the-year gifts.  Here are some of my ideas.  Anyone want to shout out their favorite??  The Beast graduates from blended-preschool in a little over a week; therefore I need to get busy!

(photo from MommyZing.com)
2.  I did try making my own animal crackers this week.  I followed this recipe, and surprisingly, they taste quite a bit like the store-bought ones.  Only mine are a little softer, a little tastier, and they do not look like animals. I got a little carried away when adding the buttermilk and so was forced to double the recipe.  We have made stars and letters of the alphabet (mostly D's and 8's, don't ask); and there are still two large rounds of the dough waiting in the freezer.  I definitely recommend MommyZing's recipe.

3.  Would it surprise you to know that homemaking does not come naturally to me? (hahaha)  Despite that, I have embraced it as my calling in life.  A good portion of my blog reading is perusing other homemaking blogs in an effort to figure out their secrets and make it more enjoyable.  Passionate and Creative Homemaking put up an thought-provoking read on "Do You Ever Feel Guilty For Staying Home?"  Been there, done that - enough times that I ought to have a souvenir collection or something!

4.  A couple of weeks ago, the Nerd and I (and little tag-along Sprout) as well as the awesome in-laws went to a Tim Hawkins concert.  (or act? or show?  not sure what you call it when the guy does Christian comedy and sings hilarious parody songs too).  Super funny.  Super made-my-day.  I especially like the pretty pink tractor song.  Enjoy.

Wednesday, May 23, 2012

Fits the Feingold Diet: Hawaiian Pizza Alfredo

Stage One of the Feingold Elimination Diet takes out a lot of fruits and veggies with salicylic acid since some kids can definitely have a sensitivity to these foods.  One of these foods is the tomato.  Oh, how we have missed the tomato!  Little did I realize how often I made Italian or Mexican dishes in the past, all of course showcasing the tomato.  A few weeks ago, the Drama Queen asked me if there was a way we could still have pizza.  "Well, honey, we can't have tomatoes right now," was my immediate answer, but then I thought, "Why not try making a white pizza?"  And here, my friends, is the result - hawaiian pizza alfredo.
For the dough, you need:
   1 cup lukewarm water
   1 TBS active dry yeast
   1 TBS oil
   1 tsp salt
   2 1/2 to 2 3/4 cups unbleached all-purpose flour
For the alfredo sauce, you need:
   4 TBS butter
   4 TBS unbleached all-purpose flour
   dash of salt
   dash of black pepper
   2 cups milk
   1/3 to 1/2 cup Parmesan cheese
For the toppings, you need:
   1 can pineapple chunks, drained (save juice for cooking the chicken)
   1 lb cooked boneless skinless chicken breast, cut into small cubes and cooked in the pineapple juice until no longer pink
   2 - 3 cups of shredded cheese (I used colby jack, but mozzarella would work well too)

Okay, let's make a pizza! (well, two actually...)
     Make your pizza dough first by adding the yeast to the lukewarm water and letting it sit for a couple of minutes.  Then add in the oil, salt, and 1 1/4 cups flour and mix well.  Keep adding the rest of the flour until you have a soft dough that pulls away from the sides of the bowl.  Turn dough out onto a floured surface and knead for six minutes until dough is smooth/elastic.  Put your dough into a large greased bowl, turn the dough over to grease the dough, and cover bowl with towel.  Put the bowl in a warm place for the dough to rise until doubled (about 80 to 90 minutes).  (I turn my oven on its lowest setting for 10 seconds and then turn it off.  The inside of the oven is then the perfect temperature for allowing the dough to rise.)  Next, turn the dough out onto a floured surface and divide into two equal pieces.  Roll each piece into a smooth, even rectangle onto a cookie sheet.
     Preheat the oven to 425 degrees.  While the oven is heating, make your alfredo sauce.  Melt the butter in a saucepan over medium heat.  When completely melted, add the flour, salt, and pepper, and whisk until completely combined.  Pour in the milk and whisk constantly until the mixture starts to thicken.  Add the Parmesan cheese to your taste and stir to combine.  If sauce is too thick, add a little more milk.  Remove sauce from heat and immediately spread it over your pizza crusts.
     Sprinkle the shredded cheese over the alfredo sauce and then add the chunks of pineapple and chicken pieces evenly over the pizzas.  Bake in the oven at 425 degrees for 15 - 18 minutes, when the crust edge is lightly browned and cheese is melted.  (The center of the pizza may seem a little soft and underdone, but it is just the alfredo sauce).

Wait a few minutes, then slice up into squares and enjoy!
 

Thursday, May 17, 2012

Fits the Feingold Diet: Crunchy Cheese Stars

So in case you haven't noticed, I have four kids ages six and under.  This means that their little tummies are often empty, and the little beggars will come around looking for snacks.  Pre-Feingold, I would give them cheese and crackers, carrot sticks, tortilla chips, granola bars, goldfish, popcorn, etc.  While some of those are still good options for the offspring, manufactured snacks such as goldfish, graham crackers, and chips are out unless I want to shell out a lot of money for the organic, no-additive variety.  The frugal me says that's not okay, especially when my kids chow through a little box of crackers in one day.  Just sayin'.  So I have been on the hunt for recipes to make my own crackers (thank you Pinterest!) with these three goals in mind:  1) it has to have healthy ingredients  2) it has to be simple and not-too-time-consuming  and 3) it has to be tasty enough that the kids will eat it willingly - otherwise, it's so not worth it!  And in my search, I found this recipe for cheese crackers.  Five ingredients.  Prep sounded simple.  Baking sounded easy.  Pictures looked awesome.  And so I tried them.  Here's how my version went down:

First, I made the dough.  It's really just like making a pie crust, with the addition of cheddar cheese of course.  I took 4 TBS of butter, cubed it up, and threw it in my food processor.  Next I shredded up the cheddar cheese to get 8 ounces (make sure to use Feingold approved cheese) and attempted to add that to my food processor.  It was then I realized that I did not own a full-size food processor, but rather a "mini", which was not large enough to fit this recipe.  What to do, what to do?  I moved the cubed butter and shredded cheese to my blender, added a cup of flour, 3/4 teaspoon of salt, and pressed the button.  What happened next was a whole lot of nothing.  The blades whirled merrily around, doing nothing.  I shook the blender and did a lot of very-unculinary-like things to try to make it work.  Nothing.  Still persevering, I transferred the whole chunky mix to my Kitchenaid mixer.  I put that baby on high until finally the mixture was incorporated enough to add the 2 TBS cold water.   I then transferred the cracker dough (finally!!) to plastic wrap, wrapped it up tightly, and put it in the fridge for thirty minutes.  (Or maybe it was an hour, I did get pretty caught up in some Facebooking and Pinteresting...)

The next step was to put the dough on a sheet of wax paper and roll it out as thin as you can.  Realizing that I only had parchment paper in my pantry, I decided it would work just as well and commenced with the rolling.  This takes some muscle work, ladies!  The paper kept shifting on the table, and my only solution was to get one knee up on the table to hold down the paper while I rolled that dough.  And no, I did not get you all a picture of that athletic feat!  Eventually, I got a nice, even, thin slab of dough to cut out my stars.  Our Ordinary Life creatively made her own cutters out of a soda can.  I happened to have a little star cutter that worked just fine.  I cut and cut and cut and cut and put all those cheesy stars on my cookie sheet, close together because they wouldn't spread at all.  And then I baked 'em for fifteen minutes at 350 degrees.

Results?  Crunchy, buttery, cheesy, tasty crackers that were more than just a little addictive!  I rerolled the remaining dough a few more times to cut out the rest of the stars and baked them too.  What crackers actually made it past the hungry crew lying in wait in the living room were stored in an airtight container for future snacking.  And despite all my struggles with evil kitchen appliances and slippery dough, I felt it was very worth it.

I did some math for you all to figure out the cost of making a batch of these yummy crackers.  I used average costs for butter, cheese, and flour, with the final total being about $1.50 for 12 ounces of delicious cheesiness.  That's a lot cheaper than Annie's Homegrown Cheddar Bunnies!

I made these crackers a second time this past week, using the mixer straight away instead of messing with the other appliances.  My dough was not as pliable that time around and was much harder to roll thin.  I think I'm going to have to spring for a full-size food processor.  Me thinks there will be many more recipes in my future using this machine...

Tuesday, May 08, 2012

Fits the Feingold Diet: Cheesy Chicken Strips and Italian Fries

We have been Feingoldin' it now for a full month now, and I have been experimenting a lot in the kitchen to make yummy, kid-friendly, Feingold-approved meals.  I made one fantastic dish - coconut mango chicken with rice - that was a dismal failure for the rest of the family.  (I loved it and ate it for days!)  Maybe I'll share the recipe for that in another post, but for today, I present to you - Cheesy Breaded Chicken Strips and Italian Fries.  
The Italian fries are super easy.  Wash seven or eight medium-sized potatoes and cut up into fries.  Put them all into a big bowl and toss with a little olive oil, basil, and oregano.  
Spread them out on a baking sheet and set aside.  They will go into the oven a bit later, and when they do, you will experience this sizzling yumminess:
For the chicken strips, take two pounds of boneless, skinless chicken breast and cut into long strips.  Make a dipping solution of one part sour cream and one part ranch dressing.  Make a breading solution of one cup soft bread crumbs (I just took the last couple of slices from the bread I had made that day and tossed them into the food processor), one half cup finely shredded mozzarella cheese, one half cup finely shredded parmesan cheese, oregano, salt, and pepper to taste.  
Dip each strip into the ranch dressing mix and then into the breadcrumb mix, thoroughly coating on all sides. Place each covered strip on a greased cookie sheet as shown.  
Put your chicken strips into the oven preheated to 375 degrees and bake.  After ten minutes, add the potatoes into the oven.  Both the fries and the chicken strips should be ready to come out of the oven in about twenty to twenty-five more minutes.  (depends on how thick you cut your chicken strips and fries!)

These are so juicy and tasty - I promise you won't even need ketchup or other dipping sauce for the chicken or the fries.  Which is a good thing, considering there are no tomatoes allowed on phase one of the Feingold Diet...

Friday, April 20, 2012

Best Sandwich Bread Ever

As I have mentioned in previous posts, we recently changed our whole family over to the Feingold Elimination Diet, a food and lifestyle plan that has helped hundreds of kids with ADD, autism, and other issues.  Before we started this diet, the Beast was having daily meltdowns, longer periods of regression, extreme lack of focus, and bouts of anxiety that would keep him awake at night.  Those were primarily the reasons I started researching for a way that we could help him naturally.
The Feingold Diet is a pretty radical change from the way we were eating and living.  We purchased the member plan for a year, which gave us access to a 300-page book of what brands and foods and beauty products were acceptable on the plan.  It also gave us a lot of helpful tips on how to get started, with a compendium of recipes to use as well as breakfast, lunch, and snack ideas.  Obviously I have neither the room (nor the permission !) to share all of that information here; but here's a very basic overview of our new way of life.
The Feingold Diet eliminates all artificial food colors, all artificial flavors, most preservatives, all synthetic sweeteners, and natural salicylates.  Many autistic children have a sensitivity to one or more of the salicylic foods, which include apples, oranges, berries, grapes, peppers, tomatoes, and other natural foods;  so these natural salicylates are removed for 6 to 8 weeks and then are gradually reintroduced to the child one at a time to test for toleration. Also, toiletries and laundry detergent have to be color-free and fragrance-free.  As you can imagine, meal planning has been quite interesting!  I am able to purchase bread, but the brands and types allowed on the diet are quite expensive and not really feasible for a family that loves sandwiches for lunch!  
So I've been making my own bread and experimenting with several recipes to get just the "right" sandwich bread.  I think I've found a winner!
 This yummy white sandwich bread is made using King Arthur Flour's recipe here.  It is (literally!) the easiest bread recipe I have ever made.  You just put all the ingredients in your bowl in the order listed in the recipe, mix and knead, let it rise, transfer it to a loaf pan, let it rise again, and bake.
Here we got a little too eager and cut into the bread before it was cool enough.  I have no regrets. :)  The recipe makes a nice soft sandwich bread that is still sturdy enough to hold tuna salad or egg salad.  I am thinking that for the most part, this is going to be my go-to recipe for bread.
I am also working on finding or creating recipes that fit in our new diet and are kid-friendly (no easy task when you don't have tomato sauce to work with).  I am hoping to share many of these in the blog in the upcoming weeks to be a help to others who may also be on the diet or at least considering it.
Oh, and are you wondering if we've seen any results?  Two days after we started it, the Beast calmly and quietly stayed at the dinner table throughout the entire meal.  This has NEVER happened before.  I have also seen him now able to control himself better and able to calm himself down without help!  We are so amazed at the change.
I should have waited until the end of writing this post to add the pictures.  I am so hungry for a piece of that bread now!  I think I'll go warm up a slice and slather it with some butter...

Tuesday, April 17, 2012

Changes

TemporaryInsanity

Did you all see I finally have a blog button? You can use the code in the box to the right to grab my button and add it to your blog if you like. Let me know if you do, and I'd love to add yours to my blog as well. We'll call it "Trading Buttons"...

More changes are coming to the blog as well as I am trying to switch directions a little, if you will. The main focuses of the blog will be our journey with autism, recipes and crafts, and homeschooling. If you're trying to find a previous post or label, use the "buttons" on the right side of the blog to find what you're looking for. I hope you'll stick around for all the changes!

Speaking of changes, there is a very unhappy and very stinky baby making eye contact with me right now...

Monday, April 16, 2012

Something's Cooking in the Classroom

Today the Drama Queen helped me make a fantastic homemade potato salad and bake hamburger buns. We worked out problems with fractions as we measured the flour and sugar. We talked about the parts of an egg and where eggs come from as I showed her the proper method to hard-boil an egg. She practiced her reading with the recipes we were following. As we rolled out the dough, she tried to think of as many adjectives as she could to describe the texture and appearance of the dough. "Squishy, sticky, smooth, tan, stretchy," she chanted as she used an empty tuna can to cut out the buns. We practiced important life skills, such as cleaning up the kitchen as we used various utensils and being aware of the dangers of hot stoves and sharp objects.

All of this was my attempt, in part, to rethink my homeschooling methods and make school "fun again" for my little girl. In the past few weeks, I have received a lot of resistance from the Drama Queen when it came down to getting schoolwork done. Math papers that should have taken minutes stretched out over hours, with tears and sighs and lots of distracted behavior. I would get frustrated and try everything I had in my arsenal to "hurry her along" and get the schooling done for the day.

But I came to realize that the success of homeschooling is not measured by how many worksheets a child does in a year, or how many books she has read, or how many painstaking sentences she has written. No, one of the main reasons we chose to homeschool our daughter this year was so that we could capitalize on her passions and help prepare her to live life armed with the skills that God has already put inside her. My daughter loves helping out in the kitchen - who knew it would be such an easy and natural "classroom" for us today? And with this new restrictive diet that our family has undertaken for the Beast's sake, I am spending more time in the kitchen anyway preparing the foods that we are able to eat.

Tonight, our entire family sat at the dinner table, savoring homemade ranch burgers and delicious potato salad, while the Drama Queen regaled us with all the details of just how she had made the buns and how Momma had let her use a knife to cut up the potatoes. I smiled at her eagerness and watched her little legs swing away under the table as she polished off all her food and asked for more. "Momma, I hope I get to go to cookery school again tomorrow," she announced. "It was so much fun!"

Wednesday, March 21, 2012

Better Than Twix Bars

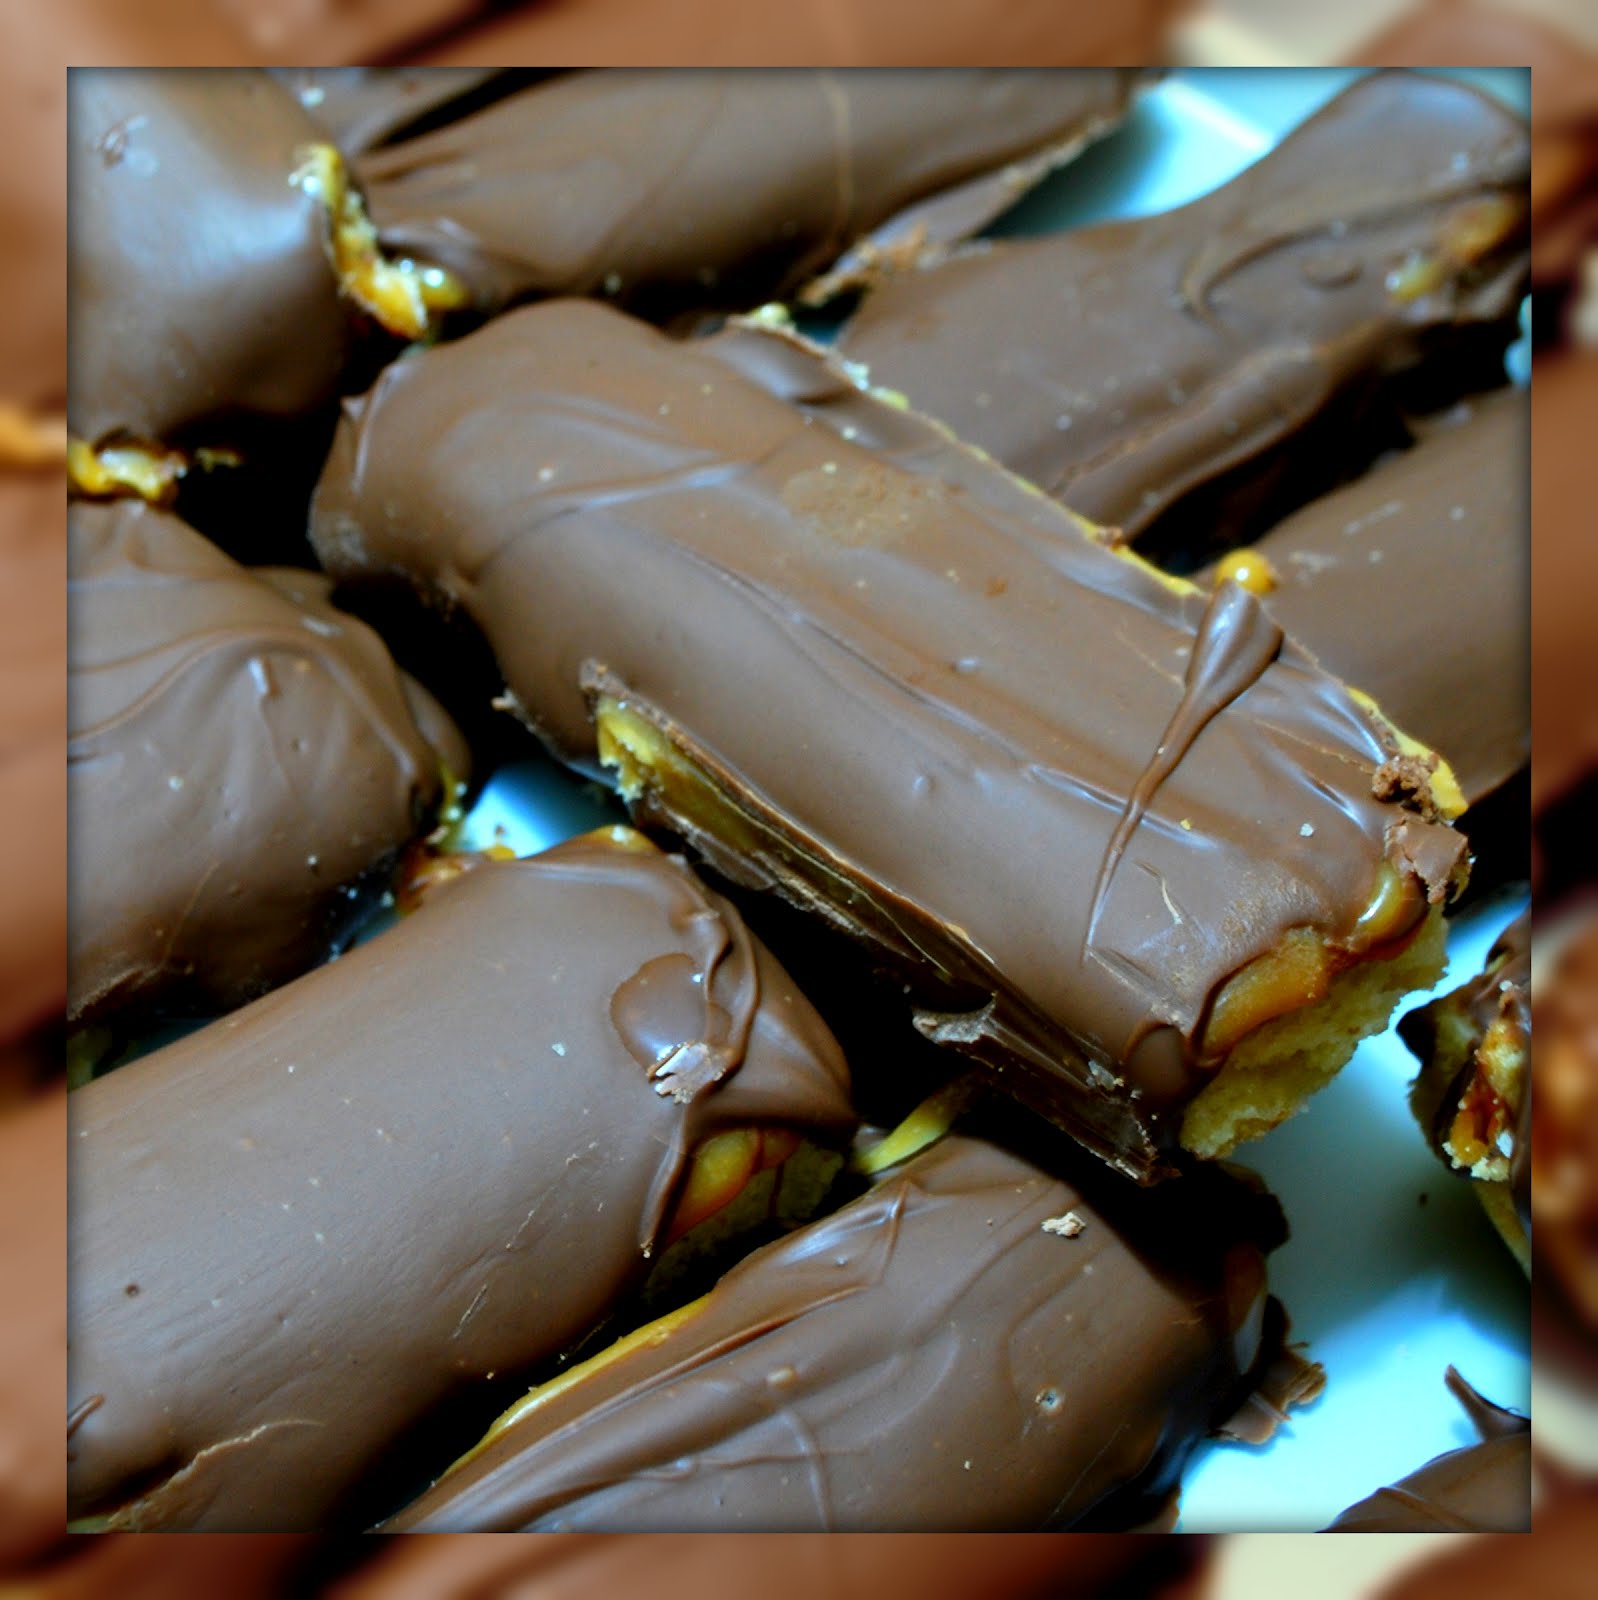
I have been finally getting to some of the bazillion projects pinned to my "Making This" board in Pinterest. I chose my "Homemade Twix Bars" pin to make this past weekend for a family get-together. The recipe comes from King Arthur Flour under the title "Thousand Dollar Bars."
Don't lick the screen now, but I promise they taste as good as they look and in my opinion are even better than Twix bars! The recipe is made in three parts: the cookie, the caramel, and the chocolate. That worked out well for me because I had three eager little helpers, each of whom got to assist in a different part.
Here's the ingredient list: (for the cookie) 2 sticks of salted butter, 1 cup powdered sugar, 2 tsp vanilla extract, 2 cups flour (for the caramel) 1 bag of Kraft caramels, 3 TBS whipping cream (for the chocolate) 2 bags of milk chocolate chips. {some of these vary slightly from the original recipe, but I chose them because either it's what I had already or what I thought would work better.}
First, you will make the cookie. Make sure the butter is at room temperature (a quick way to soften butter is to grate it or use the defrost function on your microwave.) Then beat the butter, sugar, and vanilla together until thoroughly mixed. Add the flour and continue to mix until it is all incorporated into a stiff dough.
Take this dough and press into a greased 9x13 pan. (I lined my pan with parchment paper so that it would be easy to get the cookie out later.) Make sure the dough is evenly pressed down.
Next, use a fork to poke holes in the shortbread cookie dough before baking. Then bake the cookie at 300 degrees for 35 to 45 minutes.
This is what your baked cookie will look like. Only don't look that close or you'll be tempted to eat it all up before you make the caramel and chocolate layers. Here's where patience comes in. You need your cookie layer to completely cool before you make the next layer. Don't rush it!
When your cookie layer is completely cooled, start on the caramel layer. Unwrap the caramels (this is where it is very handy to have an autistic boy who is obsessed with opening things!) and melt them in a saucepan with the cream over low heat.
Pour the hot caramelly goodness over the cookie crust and put it in the fridge for thirty minutes to harden. (Hey, I said no licking the screen!)
When the caramel layer has hardened, cut it into long thin bars with a hot knife. Put the bars back into the fridge to stay cool while you get the chocolate ready.

Melt your milk chocolate chips in a sauce pan over low heat, stirring constantly. When the chocolate is melted and smooth, it is time to cover the bars. I decided to set my bars on wire racks and pour the chocolate over them. It worked but the bars looked messy and some chocolate was wasted, which was a terrible shame. Next time I will dip the bars into the chocolate. Anyway, put your chocolate-covered bars in the fridge and WAIT for the chocolate to completely firm up before attempting a taste. Also, if you are planning on taking these to a party or some other function, you should not taste these ahead of time. Once you try one, you will not be able to stop at just one.

I can't wait to try this recipe again but use semisweet chocolate chips instead. It is definitely a time-intensive recipe but completely worth it. :) Have fun indulging your sweet tooth!

Thursday, March 08, 2012

The Craft Nerd Needs Her Mojo Back

I joined the Pinterest craze last summer in the midst of the nesting phase of my pregnancy. Within the first two weeks of joining, I had already tried several crafts, sewing tutorials, and recipes from my boards.

Then. Well, I got larger and larger and less and less motivated. My kids were lucky to be getting fed those days, let alone with some fancy recipe off Pinterest. At the peak of my largeness, Little Sprout finally joined our family and we entered a new era of crazy. I have changed my outfit three times today due to that darling little child's spit-up and other body fluids. I have not counted how many times I changed her outfit. I explored the territory of root words and suffixes with my first-grader while simultaneously nursing the baby and imploring the boys to just clean up their room already. Pinterest has dropped way down on the priority list.

So. I am determined to rediscover some of the things that originally captured my attention and do them. It might take me several weeks to accomplish them, but hey, creativity needs to make a comeback at this house. I actually started one project already (two weeks ago), and the second my hand touched the paintbrush, I did a giddy little dance of excitement. Yes, I am that crafty-nerdy.

Here's a couple of things I am hoping to try soon:


cheer me on!

Tuesday, January 17, 2012

Angry Birds Cake Pops: A Quick Tutorial

We made Angry Bird cake pops for the Drama Queen's sixth birthday. They were my first attempt at cake pops, but I thought I would share how I decorated them for any Angry Birds fans that wanted to make their own. I had plans to make all the different birds as well as the pigs, but as the night wore on, it became clear that that wasn't a realistic goal. So I settled on making the yellow bird, the red bird, and a pig.
First, I made the cake balls. It's super easy - you just make a cake mix in a 9x13 pan and then crumble it into fine crumbs when it has cooled. Then take a can of frosting (chocolate fudge for us!) and mix about 3/4 of it into the cake crumbs. Combine it well and make sure to not add too much frosting, or the mixture will be too soft. Then mold the mixture into nice round balls for the pigs and red birds. Mold some of the mixture into flattened triangles for the yellow birds. Put all of your balls and triangles on a parchment paper covered baking sheet, cover tightly with plastic wrap, and refrigerate for several hours or freeze for fifteen minutes. You don't want them in the freezer for too long or they will be too cold, causing the candy coating to firm too quickly.
For the yellow bird, I melted vanilla candy coating and tinted it with yellow candy coloring. I inserted a lollipop stick in the coating and then into the base of the triangle cake ball. I dipped the triangle ball into the coating completely and gently tapped off the excess. The eyes were made from vanilla chips with the tips cut off to make them flat. The eyebrows were simply orange sprinkles, and the hair and wings were cut pieces of black licorice. I made the beak with melted orange coating on parchment paper. All decorations were attached with more melted candy coating used as "glue", and the pupils on the eyes were done with black decorator gel.
The pig was dipped just like the yellow bird, only this time the candy coating was tinted with green candy coloring. The snout was made from a lifesaver hard candy dipped in green candy coating and the ears were made from smarties candy dipped in green candy coating. His eyes were also made from cut vanilla chips and decorated with black decorator gel.

The red bird was dipped in red candy melts and had a beak made just like the yellow bird. His eyes were the same as the pig and yellow bird, but his eyebrows were made from cut pieces of black licorice as well as his wings.

I ended up making six of each character, and my daughter (and family) loved them. Be warned that they do take quite a bit of time to make. Since candy coating does not stay fluid for long and tends to firm up pretty quickly, you do have to have time to work uninterrupted. Unfortunately I had a very cranky baby that night and tried to both decorate Angry Birds pops and soothe the poor baby. (picture me rocking her in her car seat with one foot and balancing a bottle in her mouth while trying to precariously attach a sprinkle eyebrow at the same time. yeah. not so fun.)

Tuesday, November 01, 2011

Recent Culinary Adventures

There's just something about fall that gets me much more motivated to produce satisfying and creative meals for my family. Well, it's probably not just the season but also all the wonderful ideas I see on Pinterest. My family benefits from this of course and we have found some new dishes to love.
First, I decided on a whim at the grocery store one day that we all really ought to try couscous. I had seen it many times before on various cooking shows but had never tried it. I had all three kids help me make it (this always seems to make them want to try new foods better) with butter and a little salt. I loved it - so yummy and easy - and was shocked to see my will-only-eat-cereal-or-crackers kid wolf it down.
Then I saw this recipe posted by a friend on Facebook and decided that its Mexican flavors certainly sounded appealing to this preggo lady. These taco chicken bowls simmer in the slow cooker all day and are fantastic. The Nerd raved about it and told me that I would definitely need to make more for the freezer for when baby comes. The kids were a little hesitant to try it, but we will bring them around!
While purchasing my couscous that crazy day at the grocery, I also bought a bottle of 7-up because I had seen the recipe for those 7-up biscuits over and over again. Posters raved that they were the best biscuits they had ever tasted - so I figured they were worth a try. Only a certain hubby of mine and his children decided to drink the 7-up, but I caught them in time to save enough for the biscuits. And oh. my. word. "Best biscuits ever" does not even begin to describe these delectable creations. As the Nerd ate his, his eyes widened and he emphatically stated that this was the only way I was to make biscuits ever again. Yes, they are THAT good.

And finally, the Beast wanted me to make something for his class on Halloween. Normally I would have made adorable cupcakes or cookies, but I had no energy for such creativity. So we made this candy corn bark instead. It's super easy - you just melt a bunch of white candy melts, pour them into a wax-paper-covered pan, and sprinkle the melted candy with candy corn and pretzels. When it hardens, you simply break into pieces and serve. Well, that is, until you get to school and find out that they no longer accept homemade goodies for parties and birthdays. Oh well, we just waited until after class to hand them out.
Now I'm hungry for lunch!

Thursday, June 02, 2011

Homemade Granola Bars

For snack time, invariably my kiddos will choose granola bars. They love the ones with mini chocolate chips in them and scarf them down like cookies. Between my own kids and the one I watch each afternoon, we can finish off a box of ten in two days. And at $2.50 a box, that gets to be quite a pricey snack!
So, I decided to attempt making my own granola bars. With our long road trip coming up soon, I figured it would be very beneficial to have lots and lots of granola bars on hand for the munchies. I found this easy and yummy recipe at Kitchen Stewardship, one of my favorite cooking blogs.
When the Beast learned I was making granola bars, he quickly volunteered to help. He especially enjoyed adding the honey and then mashing the whole mixture into the pan as firmly as his muscles would let him.
Of course, we decided on mini chocolate chips as our add-ins. The coconut and sunflower seeds sound delish, but unfortunately I would be the only one eating the bars if I used those ingredients. The Drama Queen also assisted in making a batch of bars.

By following the recipe and putting it into two 8x8 pans instead of the 13x9 pan, we were able to cut 24 bars. Then came the taste test. Amazing! Sweet, thick, and absolutely granola-y, everyone enjoyed our first attempt at making granola bars. I made them a week ago, and they are still as fresh as ever. The Nerd grabs one for breakfast on his way out the door, and the kids all clamor for them at snack time. In my opinion, these are a lot more filling and tasty than the store-bought kind. Best of all, I know exactly what ingredients are in each bar. And since it looks like there are not that many bars left, it looks like we will be making these again soon. ;)

Monday, November 15, 2010

Here's to Your Health

This morning, as I was preparing whole wheat English muffins with peanut butter for breakfast, an unusually alert Drama Queen (not a morning person) came bouncing into the kitchen.
"Whatcha makin', Mom?" she asked.

"English muffins, sweetie," I told her.

"Oh, good, I hope they are whole grain ones!" she replied. "Those are the kind that are healthiest, right?"

"Well, sweetheart, they certainly are good for you," I agreed.

"And we need the peanut butter because it's protein, right?" she pressed on.

"Yes, honey, it's always a good idea to start off your day with some protein."

Since September 1st, conversations like these have become much more frequent. It was in September that we decided as a family to become much healthier both in exercise and in eating habits. The transition has been smoother than I thought, especially with such young ones. It has not always been easy, as I have definitely been tempted to turn to the boxed mac'n'cheese or hot dogs when a quick meal is needed. And a few trips to McDonalds have been made in moments of weakness, but they have been rare. We have been making serious efforts in eating veggies and fruits at every meal and making substitutions in recipes whenever we can to make them healthier. Boxed dinners and packaged meals have disappeared from the pantry shelves. The kids, especially the Drama Queen, have started to pick up on the importance of each thing we eat or decide not to eat.

The changes are definitely showing! I have lost 25 pounds following a special diet which I hope to talk more about later this week, and the Nerd has lost over thirty pounds. We are both at the gym almost every day, and I am daily amazed at how much more I seem to be accomplishing with the extra energy I have.

So, I am off to make some healthy pumpkin muffins (recipe here) that I promised the kids could have tomorrow.

Have a happy and healthy Tuesday everyone!