Showing posts with label easy. Show all posts

Tuesday, November 06, 2012

Paper Bag Pinata Tutorial

I just posted about our healthy Halloween party.  For one of the party games, I made a ghost pinata using a paper bag, a little white paint, tissue paper, and glue.  It's incredibly easy but a little time-consuming.  I would recommend cueing up some Downton Abbey or other such entertainment while you work.  Here's how to make your own paper bag pinata - you can use this tutorial to make whatever themed pinata you want. 
 Isn't it cute and fluffy?  It was a shame that little Casper here had to be destroyed during the party.  Anyway, to make your own paper bag pinata, you'll need: a sturdy paper bag (bonus points if it has its own handles!), tape or a stapler, acrylic paint in the color of your pinata, tissue paper, and Elmers' glue.
 First, stuff your paper bag with a few plastic grocery bags or crumpled newspaper pages.  Then put the goodies in - trinkets, candy, pencils, whatever - and top them off with more crumpled newspaper or plastic bags until the bag is full.  Staple the top of the bag shut (or, if you're like me, lose your stapler and spend too much time looking for it before you finally give up and just tape the top closed.)  If your bag does not have handles, staple some sturdy string or ribbon to the top to use as a hanger later on. 
 Next, cut your tissue paper into squares.  I folded my sheets of tissue paper up until I had a 2" by 2" square.  Then I was able to cut several squares at one time.  You can use bigger or smaller squares too, depending on your preference.  I got my tissue paper (white with glitter) at the dollar store.  One pack of tissue paper was more than enough for this project. 
 Meanwhile, or perhaps you should do this before you cut the tissue paper squares so the paint can dry, slap some paint on the paper bag.  Cover all sides with paint, but don't worry about the paint completely covering everything.  It's just there in case the tissue paper puffs are not thick enough.
 Now comes the fun part.  Take the four corners of a tissue paper square in your thumb and pointer finger.  Put a small dot of glue in the center of the square and attach it to your paper bag so that the four corners poke out in a ruffled shape.  Do another tissue square in the same manner close to the first one.  I used a chopstick to press in the center of each tissue paper square to keep my fingers from getting sticky and to position the squares better.  Continue filling in the area all around where you started.  I started at the top corner of my bag and went acroos.
 Well, if you stopped right here and painted the rest of the bag pink or zebra-striped, you have a very cute purse pinata. :)  For any other theme, continue poking and positioning your tissue paper squares until the front and the back of the bag is covered. 
 For the sides of the bag, scrunch up some tissue paper and glue in place in the indentations to make a level surface.  Then cover both sides with more squares of tissue paper. 
 Then, decorate your pinata!  Since I was making a ghost, I glued strips of tissue paper to the bottom of the paper bag. 
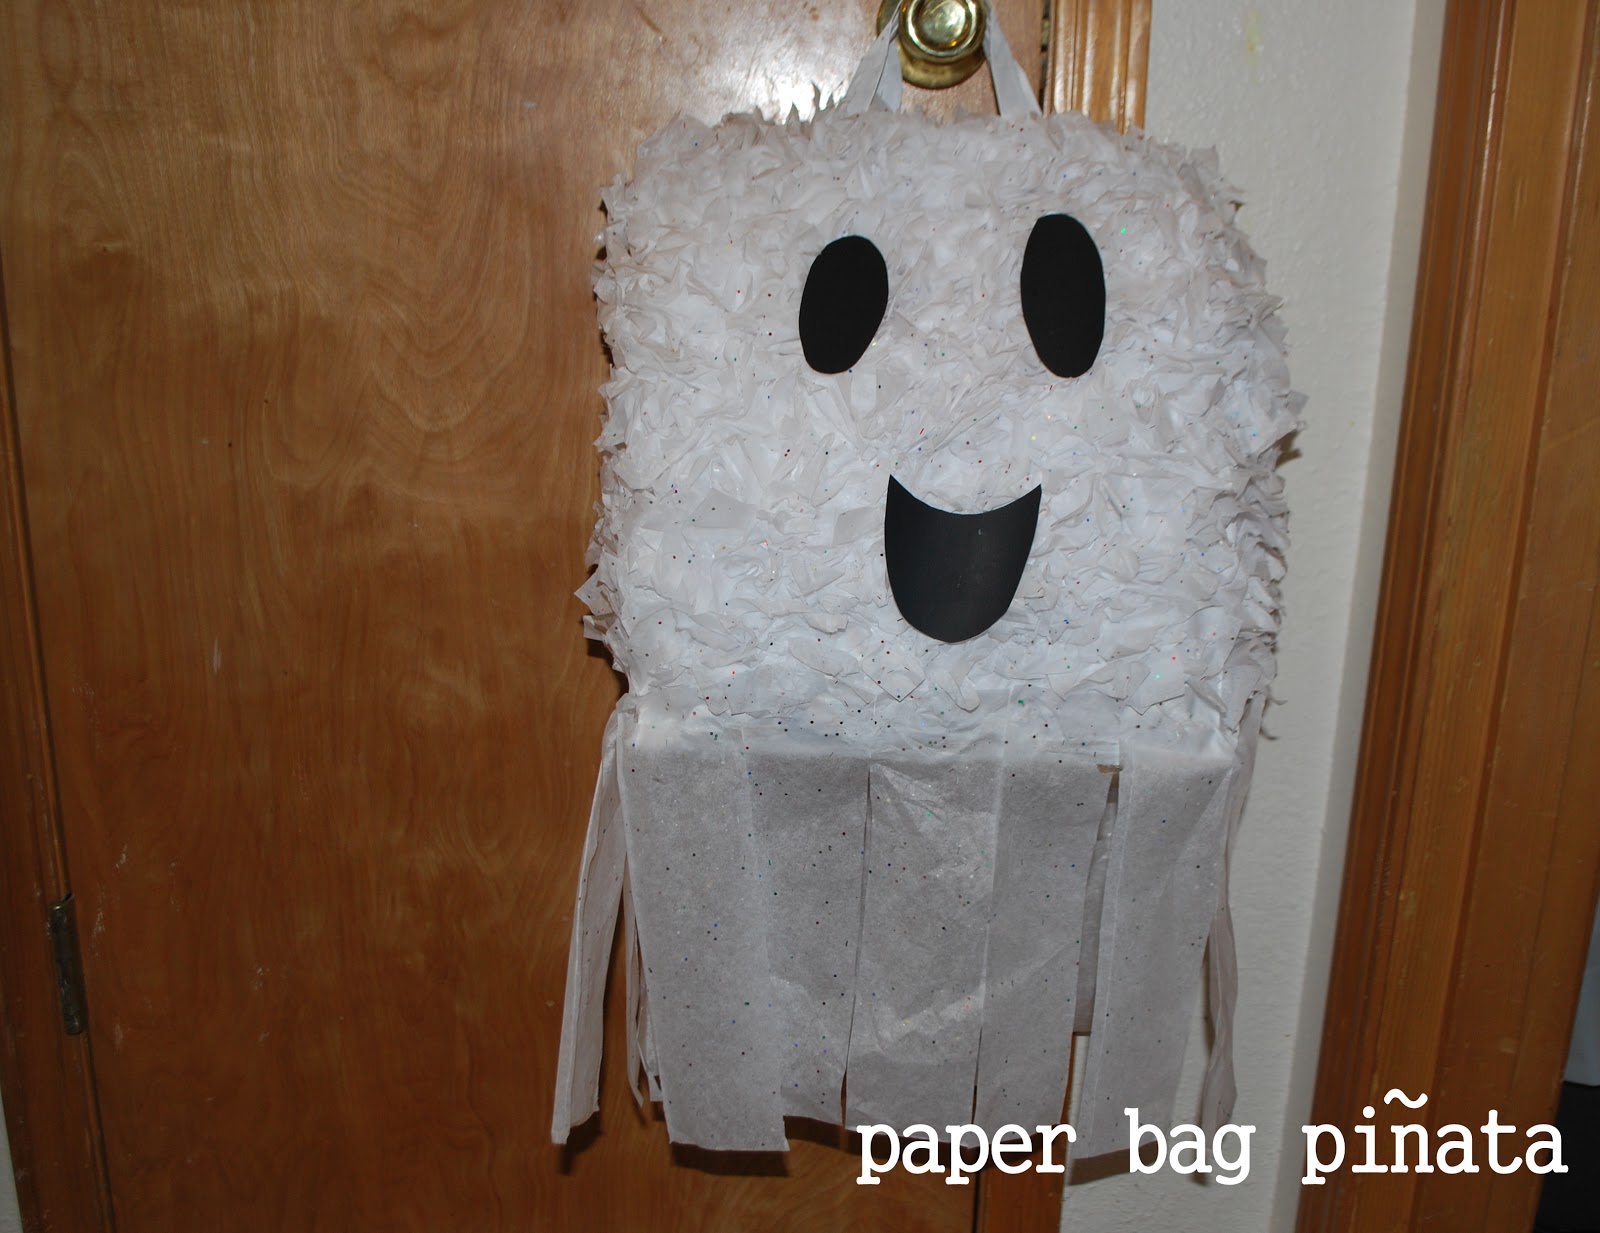
And of course, I glued on a very adorable face to make my cute ghost complete. 
 
You simply cannot get a cheaper pinata - the tissue paper was $1.00, the paper bag was free, and I already had glue and white paint lying around the house.  The biggest cost is buying the treats that go in it!

Friday, August 17, 2012

Crustless Veggie Quiche

We eat a lot of eggs around here.  They are inexpensive, a good source of protein, and versatile.  The kids love hard-boiled eggs, egg salad, "sunny-side-up" eggs baked in a muffin tin, scrambled eggs, and omelets.  They also like a good cheesy quiche!

I will admit that I am particularly fond of quiche with a buttery, flaky crust.  However, I usually make it crustless for two reasons: 1) a good crust takes a lot of time to make, and 2) no crust means a lot fewer calories.  Despite being crustless, this recipe is still hearty and makes a fantastic main dish.  I usually serve it with a side salad ( I know, more veggies, right?!) 

Here's your ingredient list:
*2 cups of chopped veggies (we have used spinach, zucchini, broccoli, carrots, herbs, peppers, mushrooms, garlic, green onions, tomatoes, etc.  Use whatever's in your fridge)
*olive oil
*1 1/2 cups shredded cheese (we like medium cheddar, but mozzarella, swiss, colby jack, and a variety of other cheeses would do just as well)
*6 eggs, beaten
*1 cup whole milk
*salt and pepper
*small amount of butter

Now make your crustless quiche! 
1.  Heat some olive oil in a pan on the stove and saute your veggies until cooked.  This should just take a few minutes - you don't want mushy vegetables!
2.  Grease an 8-inch or 9-inch round cake pan with butter and spread all the sauteed veggies in the bottom of the pan. 
3.  Add the milk to your eggs and mix well.  Add salt and pepper and the shredded cheese and stir.
4.  Pour the egg/milk/cheese mixture over the veggies in the bottom of the pan.
5.  Bake your quiche in a 350 degree oven for 35 to 40 minutes.  The top of your quiche should be golden brown, and the center should be firm.

Then cut it into slices and serve.  I enjoy mine with salsa and a dollop of sour cream spooned on top.

(Reminder:  If you are on the Feingold Program, Stage One, there are certain produce items you need to avoid in this dish, such as peppers and tomatoes.  Otherwise, this recipe will fit the program just fine!) 

Tuesday, May 29, 2012

Easy Breakfast: Happy Toast

 My Beast does not like cereal - he won't touch the stuff.  I've tried multiple varieties to entice him, but he's not taking the bait.  So much for simple breakfast.  However, that boy does love him some toast!  I often make him Egg-In-A-Hole to make his toast a little more nutritious and satisfying.  He calls it his happy toast. :)
It's incredibly easy to make.  You just need a good sturdy piece of bread (pictured is a slice of homemade honey wheat bread), an egg, and some butter.
How to Make Happy Toast:
1.  Melt some butter in a skillet over medium high heat (or on a griddle).
2.  Cut a shape out of the center of your bread slice with a small cookie cutter or drink glass.
3.  Place the bread slice on the melted butter in the skillet.
4.  Traditionally, Egg-In-A-Hole is made by cracking an egg directly into the hole in the bread.  My Beast likes scrambled eggs better; so I whisk up the egg first and then pour it into the hole.
5.  Hold bread in place with a spatula while egg cooks.  (You don't want the egg to run out all over the skillet!)
6.  When egg is mostly cooked, flip bread over to finish cooking the egg.
7.  Serve it up to your kiddo and look for a delighted smile at the fun shape in his toast.  This will confirm that you have just made. . .

HAPPY TOAST!   Here's to a wonderful Tuesday to all you readers out there!

Monday, May 21, 2012

From Jeans to Fabric-Edged Shorts - A Tutorial

d
Although the weather here in western Oregon simply can't make up its mind, I am going ahead and clearing out the winter clothes and figuring out summer wear for the kiddos.  The Drama Queen wants shorts because "my other pants make me all hot and sweaty and dis-gust-ing."  Last year, she had the cutest knee-length shorts in a variety of colors and styles;  but apparently this year, shorts styles have gone the abundantly-short-and-skanky route.  No daughter of mine is going to wear shorts that could double as underwear!  Noticing that several pairs of jeans were going into the "getting-too-short" pile, I decided to make those into shorts for my girl.  

Here's how.  First, have your girly put the jeans on and mark on each leg about where you want the shorts to fall.  I used a Sharpie 'cuz I'm classy like that.  Cut off the jean legs at the mark.  (Save the jean legs for a future project.  Let them sit around in a messy pile for a while.  Realize that you are never going to get to the yet-undetermined project.  Throw them away!)

 It really doesn't take much fabric at all to make the edging for the shorts.  I had the Drama Queen look through my fabric stash and choose her favorite.  Measure around the short leg and add a little extra for length.  Decide how wide you want your edging to be and double that plus a little extra.  Cut two strips following these measurements.  Fold each strip like the photo above and iron so that the folds stay in place.

 Next, pin your strips in place.  The part of the strip that has the edge folded down a little should be on the outside of the pants leg.  Then sew with a straight stitch about a half-inch in from the top of the edging.

I went ahead and sewed a remaining scrap of fabric into a tie belt for the shorts, as the Drama Queen is skinny and hipless and needs all the help she can get to keep her pants up.

Easy.  Cute.  Very washable.  These particular shorts are her new faves and have gone through the wash several times already without falling apart.

Oh, and not skanky at all...

Wednesday, May 02, 2012

Iphone Photo Phun - It's Not Rocket Science


I love Oregon, but apparently spring has decided not to come here this year.  We have had more cold and rainy days than I can count.  This means bored, restless, I-am-going-to-do-something-crazy-if-sunshine-doesn't-appear-soon kids. 
Here's one of our latest favorite indoor activities.  Take a plate and put a couple of drops of dish soap in the center.  Run tap water over the soap to fill the plate and create a few tiny bubbles.  Give you kid a drinking straw and show them how to blow bubbles into the water.  With a little practice, they can blow giant bubbles.
My kids will do this for over an hour.  No joke.  Why do I buy them toys??!!

(linking up with Iphone Photo Phun today)...

Friday, November 18, 2011

Art Project #5 - Thankful Turkeys

This week's project is in preparation for Thanksgiving coming up next week. You should already have all the materials on hand, and the steps are super easy!

Project Title: Thankful Turkeys
Materials Needed: white paper, crayons, scissors, glue stick, pencil or pen
Purpose: To practice coloring and cutting skills as well as express the things one is thankful for.
Aren't these just the cutest turkeys?
First, you will need to trace your child's hands and one foot on the white paper. (The photos show a turkey made from an adult's hand and footprints; of course a child's prints will be smaller.) Have your child color the foot shape brown for the turkey body and the hand shapes in multiple colors for the turkey feathers. Assist them in cutting out the three shapes.
Make the other shapes needed to complete the turkey. Three triangles colored yellow will serve as a beak and feet. Two skinny yellow rectangles will be the legs, and don't forget to cut out two little eyes and a wattle. (Googly eyes would be cute too if you have them on hand).
Using the glue stick, have your child glue the two hand shapes together as shown. Cut off the thumbs - they won't be necessary for the project.

Then, help your child glue the rest of the turkey together. The foot shape comes next as the turkey body, glued on top of the hand shapes. Next, glue the facial features to the turkey's head. Finally, glue the legs to the back of the turkey body and glue the feet on the ends of the legs.

If your child is old enough to write, have them write down eight things they are thankful for. Cut out the words and glue to the turkey feathers. Write "(Name) is thankful for" on a small circle of white paper and glue to the turkey's tummy.

Then of course, don't forget to display the resulting cute turkeys for your Thanksgiving celebration! Save them afterwards, as they will be permanent reminders of the size of your little one's hands and feet at this age. :)

Friday, September 02, 2011

Melty Crayon Awesomeness

Last week I pinned a melting crayon art project on my Pinterest boards with plans to use it sometime this year as an art project for home school. It looked so fun and easy, and I knew I had all the materials to do it. Eager to try it, I gathered all the kiddies at the kitchen table for a science/art lesson. First, we discussed rainbows - how they form, when you see them, etc. Then we learned ROYGBIV - the order of the colors of the rainbow. Using this new knowledge, I set the kids to organizing our crayons in rainbow order. We used two boxes of Crayola 24 crayons, and I took away the black, gray, brown, and white crayons since those colors do not appear in rainbows.
When the kids (mostly the girls) had carefully selected where each crayon should go, I hot-glued them in place at the top of our canvas. (Our canvas was 16" by 20", because that's what I had). We decided to keep the color name of each crayon facing outward so that they would all look uniform. Then the fun part started.
We propped up the canvas on a chair that I had liberally covered with newspaper. Using a hairdryer turned on high heat, I aimed it slightly downward at the purple/blue section of our crayon rainbow. The kids were delighted that immediately it began to melt and spray all over the place.
Each of the kids took turns making their own crayon wax splatters and using the "paint gun." (the Spud's words)>
We had a lot of splattering going on - I forgot to cover the side of our kitchen table with newspaper and soon it was speckled with various colors. In all the links I've seen, the artist managed to get their crayon wax flowing downward in straight lines. I think perhaps that's because they used a lower hair dryer setting or a different angle on their canvas.
Also, they probably didn't allow three-year-olds to man the hair dryer. :) I personally love the splattered look.
We then turned our hair dryer to low for a short while to blend our colors just a bit.
Here's a close-up of the colors all blended together. I'm not gonna lie - I was probably as excited or even more than the kids at this development. We still had quite a bit of blank canvas, and the girls suggested that we sign our artwork. I got the idea to trace each person's hand with their favorite color (with crayons from another box) and write their name with black sharpie in the center.
The kiddos posed proudly with their work (by the way, the crayon wax dries super fast so you don't have to wait forever like you do with paint.)
And then this pleased momma found a place in the dining room to hang it on the wall. The kids love to look at it, touch its interesting textures, and talk about ROYGBIV. Me? I'm planning our next masterpiece, perhaps in greens, grays, browns, and blacks for a camouflage effect for the boys' room.

Thursday, August 25, 2011

Tutorial: Goomba Iphone Case

So. As I mentioned in a previous post, for the Nerd's birthday he usually chooses what he wants for his birthday and then I go get it for him. This year it is apparently something Xbox-related. However, I always like to give him a little something else - usually something from ThinkGeek.com - something he would not expect that shows his wife actually pays attention when he talks on and on about his computer and gaming adventures.

This year, I didn't think of it until the day of (gulp! such a procrastinator) and after perusing the internet for ideas, I finally decided to make him a fun little case for his Iphone (or for whatever he wants to use it). I debated over favorite game and TV characters and came up with a Goomba (from Nintendo's Super Mario Bros) since it has "manly" colors and has a shape that works well with a phone case.

Want to make one too? Here's a tutorial to help you speed through the process as fast as I did (remember I made it on his birthday!) Since I was in a a bit of a hurry, there are a few changes I would make and have noted them along the way. If I were you, I would read through the tutorial first - switching steps #3 and #4 would have made things a lot easier, just sayin'.
1. First gather your materials. You will need felt in these colors: dark brown, medium brown, white, and black as well as some embroidery floss to match the felt colors. You will also need some velcro for the case closure. Tools needed are an embroidery needle and a hot glue gun.
2. Now cut out all your felt shapes. For the main case, cut one white rectangle (4.5" by 10"). For the head, cut one medium brown rectangle (4.5" by 5.5") The shoes are cut from dark brown felt and measure 1.5" by 1.75" with curved edges, as shown. The mouth is cut from black felt and measures 4.5" by .5". The other pieces do not have measurements. Cut the whites of the eyes first - 2 tear-drop-shaped pieces of white felt. Next cut the pupils of the eyes from black felt - 2 oval shapes that are smaller than the whites of the eyes. Measure the tops of the whites of the eyes and cut black eyebrows slightly larger. (I made my eyebrows one piece and folded it in half before cutting to get uniform-looking eyebrows.) The teeth are cut from white felt and are just small triangles.
3. Fold your main case piece in half so that the folded edge measures 4.5" across. Thread your needle with all six strands of white embroidery floss and blanket-stitch around the sides and bottom (folded edge) of your case. Leave the top open. (If you need help with blanket stitching, here is a great tutorial).
4. Now thread your needle with medium brown floss (all six strands again) and use a running stitch to stitch it to the back side of your case only. Do not stitch through both pieces of white felt. (this is why it would have been better to do this step first). Notice in the diagram that the brown piece is placed two inches down on each side before stitching.
5. Now blanket-stitch each side of the case flap (the brown felt.) You do not need to stitch across the top as that will be covered by the mouth.
6. Now attach your velcro pieces - one to the case flap and the opposite piece to the main case, as shown. It was hard to see the white velcro on the main case so I outlined it in pink for you :). I used hot glue to attach the velcro, but after several eager little hands opened and closed the case multiple times, the velcro on the main case came loose. I would take the time to use a few strands of embroidery floss and sew those suckers on tight!
7. All facial features and shoes should then be glued on, in the order shown in this diagram. Use hot glue and make sure your glue gets close to the edges of each piece so that it will stay firmly in place. (Don't burn yourself - use tweezers to place pieces!)
Now you have a little Goomba just ready to protect your Iphone. The measurements for the case given were for an Iphone 4, but you can certainly modify it to work for any electronic device you want. I was also thinking this little guy would make an awesome gift card holder.

I wonder what other characters would make a cute case?

Friday, July 10, 2009

My Bagel-ful Taste-monial

I am one of one hundred bloggers that get to do a Taste-monial on the new Kraft Bagel-fuls for  5 Minutes for Mom.  Here it is  - in crazy, sometimes-double-spaced paragraphs because my computer is refusing to cooperate with me:
When I give the Drama Queen, the Beast, and the Spud a choice to have a special breakfast, they almost always choose donuts. Of course. You know, the kind topped with ridiculously unnatural frosting and a pile of sprinkles. Naturally. So when the kiddies eat their “special” breakfast, you can imagine the mess. The Drama Queen is the neatest but usually still manages to spread a lot of crumbs in her wake. The boys look like they have just come out of a pillow fight with the Teletubbies and lost!
So when it came time to try the Bagel-fuls, I informed my offspring that we were going to have a “special” breakfast that day. They immediately clamored for donuts, and being the wonderful, responsible mom that I am, I said that we were having donuts. “Special” donuts with the frosting inside. This immediately piqued their curiosity, and they hurriedly bit into their Bagel-fuls to find the “frosting”. The Spud finished his first and asked for more (his latest baby sign language word) and the other two also seemed to enjoy theirs as well. When I asked them if they liked them, the Beast nodded and the Drama Queen asked me to please be quiet so she could finish watching her morning cartoon.
 Yes, folks, another proud parenting moment!  Afterwards, I stood there and stared at the breakfast table. Something was not right here - where were the crumbs scattered all over the floor? The frosting smears cemented on the table’s edge? I stood in shock as I mindlessly munched my own Bagel-ful, realizing that this new product saved me a big mess with the kiddies. “This would be a great breakfast to go; at least I wouldn’t have to clean out the minivan every time,” I thought. And then I realized that the Bagel-ful I was eating was good. Really good. So good I wanted another.  But there are only four to a box. So it’s back to cleaning up piles of crumbs and gobs of blue frosting, because I am NOT sharing my Bagel-fuls!